

Tips for food photography
Posted by FONDOS PARA FOTÓGRAFOS

If you are thinking about doing food photography , you have chosen the best time. Thanks to the posibilities we have today of taking photos and communicating them through social networks, you will have the opportunity to learn and develop your food photography faster than ever before in history. We are sure that these tips for food photography will be useful to you.
Food photography has its peculiarities and one of them is its multidisciplinary nature since you will not only have to photograph, but you will also have to design and know how to deal with food. Being part photographer, part designer, cook and kitchen helper.

As a food photographer, your goal will be to make food look its best. To do this, you'll need to choose a recipe that will be your hero dish. Of course today we are very used to seeing many images all the time, and cooking your recipe well and making the dish delicious may not really be enough for that shot to convey how you feel about your food.
Therefore, we are going to try to give you an initial structure and some food photography tips so that you can start producing quality photos. The quality of your photos will attract much more attention and will also bring you a lot of satisfaction and will make you have more and more enthusiasm for cooking. In this way cooking and photography will become two disciplines that you can alternate.
Therefore, you will be able to develop these new cooking and food photography skills, to turn them into either a hobby for life, or even a business that redefines your professional career. So if you want to give it a try, let's go for it!
Tips for food photography: preparation
1. Get inspired and look for references
All artistic movements have used other artists as a reference and this is for a specific reason. When we look for references, we are doing the first creative exercise, which is to understand and get to know ourselves better on an artistic level. We use Pinterest and Instagram to find images that serve as inspiration.

2. Use fresh ingredients
The use of fresh ingredients is not limited to chefs! Creative food photography is all about how appetizing the dish looks. A bruised tomato or slightly wilted lettuce leaf will ruin your photo, no matter how hard you try to hide it.

3. Create a story to add some depth
Once we have clear references and even the recipe with all the purchased ingredients, we recommend doing an exercise of imagining the scene that we are going to set up and think about what we want to convey with it. Whether for aesthetics or content, this exercise will be key to start preparing the photo session.
For example, if we were to photograph a winter soup, we could use a candle to give that extra warmth and comfort to the photo. We can also think of using old dishes of our grandparents to add even more homemade and close feeling to the food. And we can think of putting a napkin and a background of dark and desaturated colors.
All of this will help tell the story of your dish and create quality in your food photography. Ultimately, the secret is in the emotions that you transmit with your photos. If your photos are of quality will help make the first impression good and they will be much more interested in your story.

Tips for food photography: the session
4. Use a photography backdrop or surface that suits the scene
Food photography backdrops should generally be kept neutral, so go for pastels, earth tones, or grays to make your food pop. At least at first it is better to get used toworking with neutral colors since combining saturated colors is more complicated.
You can also use a surface that you have at home such as a table or a nice countertop. However, not all of us have a polished concrete or a beautiful wood countertop at home and that is exactly why we created our Fondos para Fotógrafos.
Our photography backdrops are specifically designed for food and product photography. You can take a look at our category of Basic Backdrops where you will find good examples of backdrops to get started in food photography.


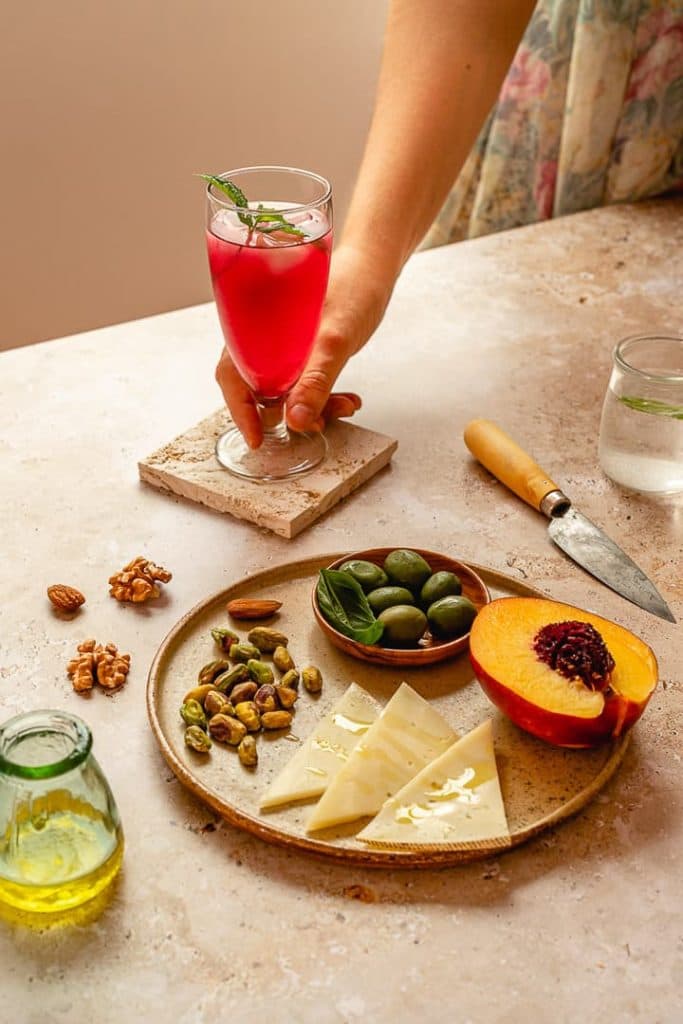
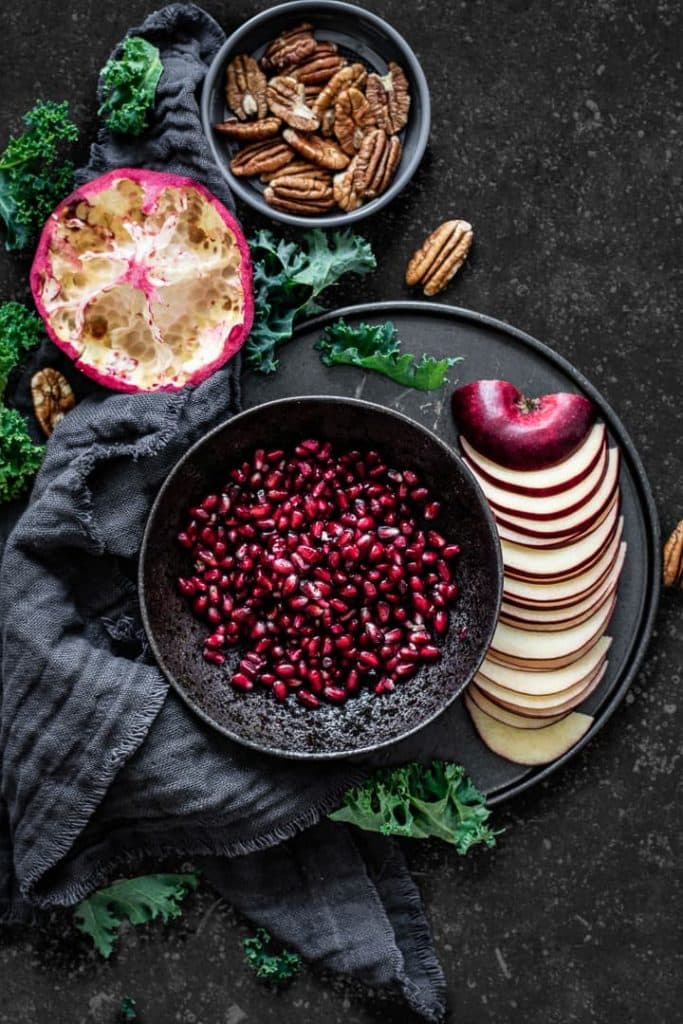
5. Add meaningful props
You can surround your plate with accessories that are related to the dish that we are going to cook (ingredients, utensils or sauces), as they will help to build that story we are looking for behind the photo. You can also experiment with jars or fabrics that indicate the origin or season of food.
Taking note of these little details will definitely help you add some depth to the photo.

6. Play with light and point of view
Good lighting in your scene can help capture the perfect photo. You will have the option of using natural light or artificial light. If you're just starting out with food photography, we recommend using natural light. What's more. we recommend that you use the light from a window.
Yes! As simple as that. Use the light from the window over and over again, until you get used to the changes in light at different times of the day. Now that you have the light in place, you have 3 places where you can take the photo of your food.
In other words, you have 3 points of view or angles from which you can take your photo.
- 45º angle: It is the diner's point of view, which makes it look very natural. You can leave the light from the window backlit to add more drama, or more frontal so that the food appears cleaner.
- Cenital Angle: It is a point of view widely used in food photography since it is visually attractive and creative. You'll need to use a ladder or chair to take this photo, or else place the scene on the ground. Try to place the camera level and exactly above your hero plate for the best result. Here you can choose to let the light enter from the right or left of the photo, from above the photo or from below. We recommend using a diagonal light from top to bottom to start with. It usually gives very good results.

- Level: It is especially useful for dishes that are very high such as cakes. Light here plays an important role. To gain more volume, you'll need to avoid the front light. However, if you want all the details to be appreciated well, it can be a good option. The back light is only good if what we want to highlight is the silhouette of the food.

7. Select the good side of your hero dish
Like faces, food also has its good and bad angles, so if you're tempted to stick to the same one over and over again, you better think again and make a conscious decision. Think about the unique qualities of that particular dish and select the angle that best highlights these characteristics. Don't be afraid to explore and be creative as a food photographer!

8. Take care of the details
A little makeup, styling, and accessories can work wonders during a portrait photography session. Similarly, food photography can benefit from a few subtle styling tricks that make the food look irresistible. For example, you can add a dash of oil to your meats to make them look more succulent, while a salad can look fresher if you sprinkle a little water on top.
As for food photography props, it's a good idea to keep them clean and simple, along with the background in the scene. Remember, the food should be the highlight, so don't choose any type of tableware that shifts the focus from the star item.
Also, keep in mind everything is spotless if you're taking close-up or macro food photography. Unless you deliberately decide to leave a few specks, drops, or crumbs, keep things clean.

9. Don't over-plate
As tempting as it is to pile food on a plate, this won't look good in a photo. Food photography is all about keeping things simple, meaning less is more. Too much food on one plate won't grab your audience's attention, so leave plenty of room for them to delight in the small details of the plate.

10. Add a touch of life
Once the food has been placed in the scene where you will photograph it, don't stop after capturing the "perfect" photos of the food intact. Perfection lies in the imperfections, and the credibility of the scene.
For example, a cake will look more appetizing when cut, as all its textures and colors will be revealed, giving the photo an extra touch of flavor. Similarly, you can add a little life to a photo of a brownie by pouring hot fudge sauce over it. Unlike a static photo of the brownie, this pouring action will transform the photo into something with movement and depth.

11. Be quick on your feet!
Another great tip for any food photographer is to be quick and don't let food sit too long. Some foods require you to move quickly once they are ready.
If you're shooting ice cream, it will start to melt over time, while the meat will start to look dry if left out. For the best results in your creative food photography, try to finish most of the scene while the food is cooking, or have it fully prepared before you even cook it.
In order to prepare the scene, you can use some empty plates and bowls and test the lighting, composition and camera settings. Once the food is ready to enter the scene, you will be able to make the photo much faster and focus only on finishing the necessary styling details and changing the point of view to have more variety of photos of the session.
12. Photograph the process
Getting some snaps while the food is cooking is a great opportunity to get some fabulous and delicious photos to complement the photos from the session. Some dishes look better while they are being prepared. In addition, this helps to tell the story of the dish, making the spectators participate in the preparation. People who see your photos will probably be passionate about food and photography and therefore it will be great to be able to share with them your recipes, ways of cooking, and also your lighting schemes and styling decisions in your scenes.

Tips for food photography: Editing
13. Do not increase the saturation too much. Don't edit too much either.
Editing can make or break your photo. It's pretty easy to fall into the trap of boosting saturation to try and make your plate of food more appetizing, with rich colors.
While food looks most delicious when its vibrant colors come through, over-saturation will make food look weird or even unnatural. Using things like props, lighting, and backdrops, try to get as close as possible to real colors.
In general, a good way to look at the editing process is:
Correctly photographing the scene: This is having a correct exposure, a good white balance and good camera settings in general. Edit the photo so that it transforms from a correct photo to an attractive photo: There are many ways to do this, but applying a little brightness, saturation and contrast will be enough to start with. All with moderation!
Many times you will think that the photo is missing something and probably the problem cannot be solved with editing. It's best to repeat the whole process again and take a new photo, as you'll probably get a little better at every step of your food photography prep and shoot.

Conclusion on our tips for food photography
14. Don't spend too much time reading food photography tips articles
There is a lot of information on the internet and you will probably be able to find many articles and tips on how to photograph food. However, the learning method that will really give you the foundation to be able to take good photos is not to read articles until you become well versed in all the do's and don'ts.
So our most precious advice is: spend less time on the computer and more time with the camera in hand.
For anyone who wants to, we propose this learning scheme that can help you make a radical change in your photography in a short time, since it is based on practice and repetition.
- Observe: First we find a photo we like.
- Analyze: We analyze that photo with all the tools at our disposal. For example, you can analyze what backdrop has been used in the image. We are left with a challenge. For example, try a photo with a light background in high-key (without burning the photo)
- Experiment: We carry out the photo session emphasizing overcoming our own challenge.
- Observe again: Finally we observe again and see if we like the result, if we liked the process, etc. And we find another photo that we like and start again.

In any case, food photography brings together the best of both worlds, cooking and photography, and is a wonderful way to spark your inner creativity. There's a whole wonderful community of food photographers out there that can inspire you and even help you improve. Share your photos with us and tell us what you think of the article!